
Ever wondered how you can give your bike a fresh lease of life without breaking the bank? Refurbishing your ride with pre-owned components can be a game-changer. This guide will walk you through the process, helping you save money while achieving impressive results.
Whether you’re working on a classic CB350F engine or restoring a vintage frame, this guide covers everything you need to know. From sourcing the right piece to setting up your workshop, we’ve got you covered. You’ll also learn practical tips and safety checks to ensure your project runs smoothly.
Refurbishing your bike is not just about saving money; it’s about the satisfaction of bringing something old back to life. However, always remember to follow local regulations to ensure your project is safe and compliant. Ready to dive in? Let’s get started!
Key Takeaways
- Refurbishing your bike with pre-owned components can save you a lot of money.
- This guide covers sourcing, workshop setup, and step-by-step assembly.
- Practical tips and safety checks are included to help you along the way.
- Always follow local regulations to ensure your project is compliant.
- Bringing an old bike back to life is a rewarding experience.
Understanding Your Project and Essential Supplies
Before diving into your bike project, it’s crucial to outline your goals and gather essential supplies. Start by defining the scope of your work. Are you restoring a classic model or upgrading a modern ride? This clarity will help you identify the components you need and avoid unnecessary expenses.
Gathering the right parts is the backbone of any successful build. Focus on key elements like the engine and frame, as these form the foundation of your bike. If you’re working with a pre-owned model, you might already have some components. However, ensure they’re in good condition or plan to refurbish them.
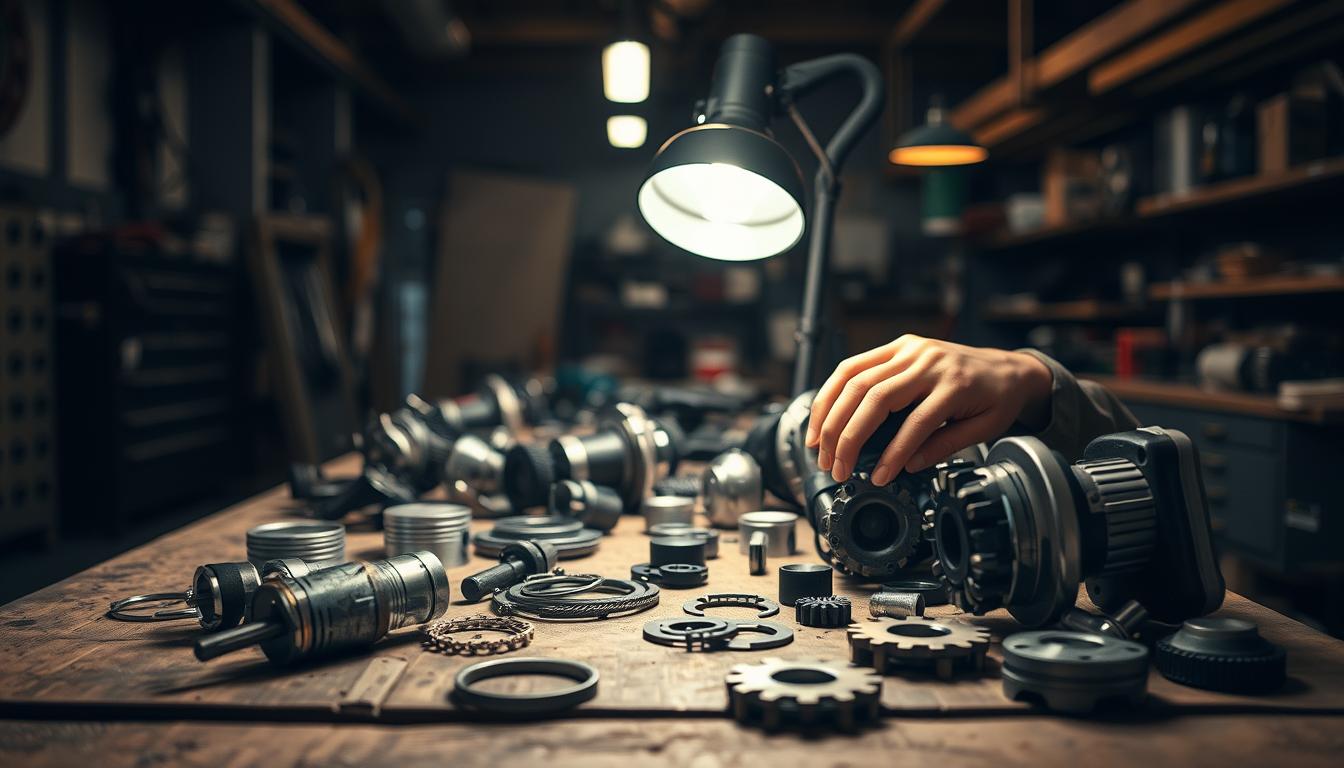
Setting up your workspace is equally important. A well-organised workshop ensures efficiency and safety. Invest in quality tools like wrenches, screwdrivers, and a sturdy workbench. Keep everything within reach to save time and reduce frustration.
When sourcing components, explore both online marketplaces and local suppliers. Online platforms often offer a wide range of options, while local shops can provide hands-on advice. Research is key—verify the compatibility of parts and ensure they meet your project’s requirements.
Planning and ordering parts in advance keeps your project on track. Create a checklist to avoid missing anything. Whether it’s a brand new engine or a pre-owned frame, careful preparation ensures a smooth and rewarding build.
Choosing Your Starting Point: Engine Versus Frame
Deciding where to begin is often the hardest part of any bike restoration. Your engine and frame are the core components that define your project. Starting with the right one can save you time and effort in the long run.
If you already have a functional engine, it might make sense to build around it. On the other hand, a sturdy frame can serve as the foundation for your entire build. The choice depends on what you have and what you need.

Evaluating Your Available Engine Options
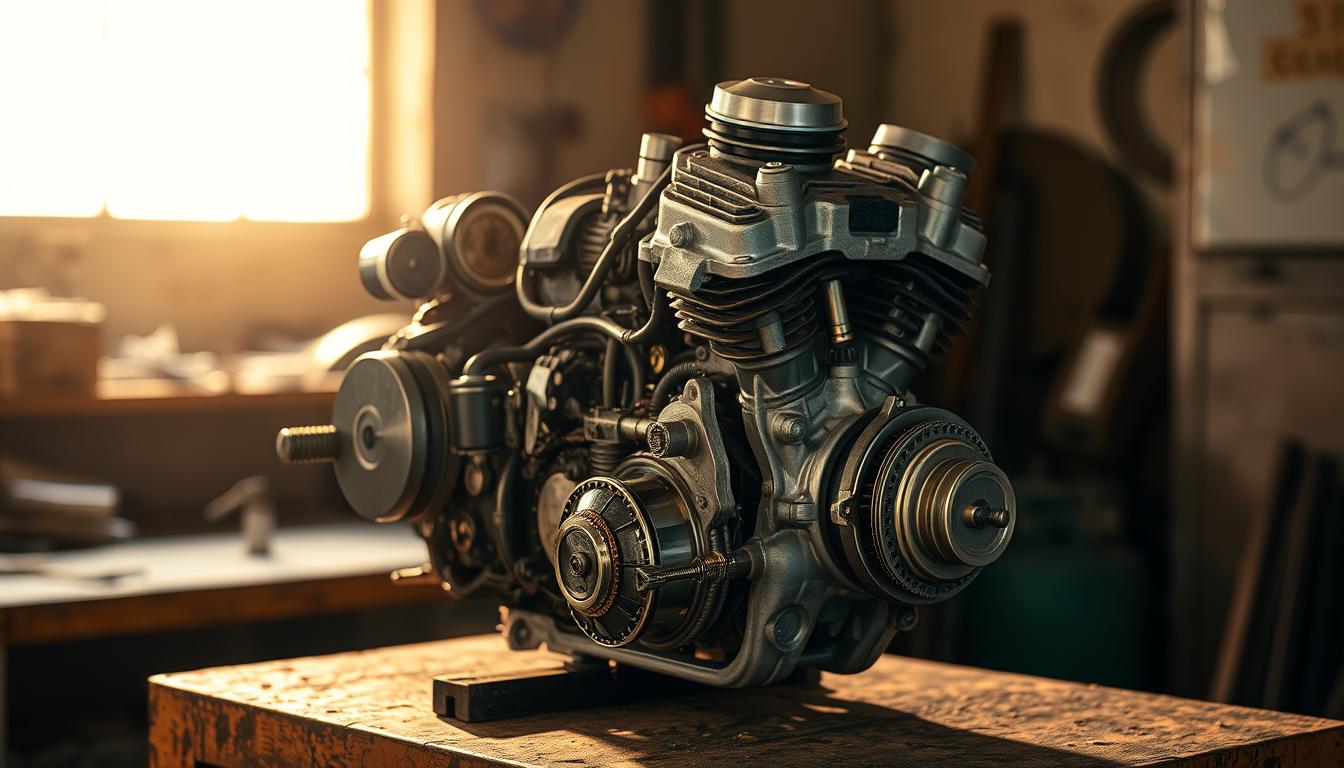
When assessing an engine, check for functional components like the carburetor, wiring, and exhaust system. A CB350F engine, for example, is a popular choice due to its reliability and availability of parts.
Look for signs of wear, such as oil leaks or rust. If the engine has been sitting for a while, it may need a thorough cleaning and tune-up. Always verify compatibility with your frame and other parts.
Regulatory requirements in Australia, similar to those in France, often mandate emissions standards. Ensure your engine meets these guidelines to avoid legal issues down the road.
Selecting a Suitable Frame for Your Build
A frame must be structurally sound and compatible with your engine. Check for cracks, rust, or bends that could compromise safety. A classic CB350F frame is a great option for vintage builds.
Consider the weight and size of your engine when choosing a frame. You’ll also need to account for additional components like the fork, seat, and gas tank. A well-chosen frame ensures a smoother assembly process.
Sourcing missing bolts or dealing with worn pieces can be challenging. Dealerships and independent suppliers often have the parts you need. Plan ahead to avoid delays.
| Starting Point | Pros | Cons |
|---|---|---|
| Engine | Defines power and performance | May require extensive refurbishment |
| Frame | Provides structural foundation | Needs to match engine specifications |
Whether you start with the engine or frame, a detailed plan is essential. This approach ensures your project stays on track and delivers the results you want.
Researching and Sourcing Model-Specific Components
Finding the right components for your bike can make or break your project. Whether you’re restoring a classic or upgrading a modern ride, sourcing the correct parts is essential. This section will guide you through the process, helping you locate everything from carburetors to wiring harnesses.
Finding the Right Carburetors, Covers, and Wiring
Start by identifying the specific components your bike needs. For example, a CB350F engine requires compatible carburetors and wiring systems. Research your model’s specifications to ensure accuracy.
When searching for covers or wiring harnesses, check for signs of wear or damage. A thorough inspection can save you time and money. If you’re unsure, consult online forums or local experts for advice.
Exploring Online Marketplaces and Local Suppliers
Online platforms like eBay and Craigslist offer a wide range of options. These marketplaces are ideal for finding rare or discontinued parts. Always verify the seller’s reputation and check reviews before ordering.
Local suppliers can provide hands-on assistance and immediate availability. Visit dealerships or independent shops to explore their inventory. Building a relationship with a trusted supplier can be invaluable for future projects.
| Source | Pros | Cons |
|---|---|---|
| Online Marketplaces | Wide selection, competitive prices | Shipping delays, risk of counterfeit parts |
| Local Suppliers | Immediate availability, expert advice | Limited inventory, potentially higher costs |
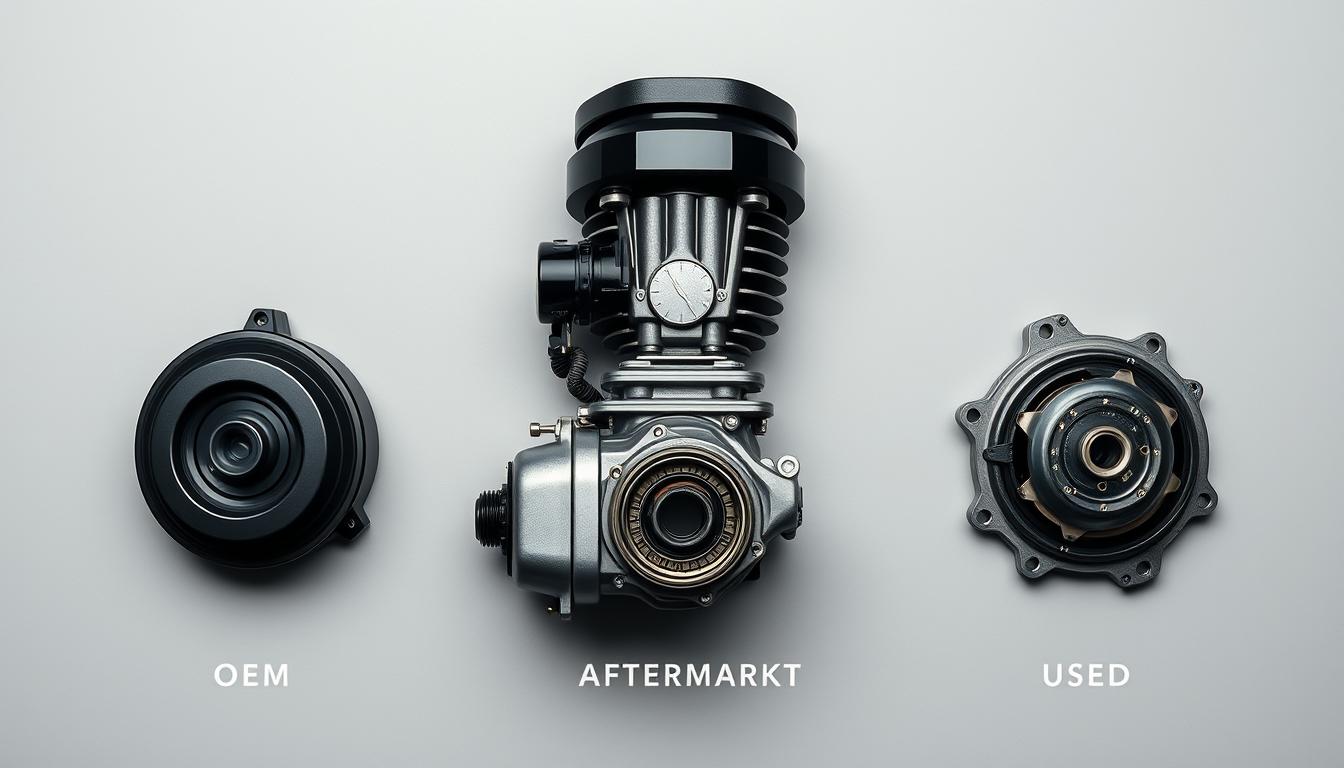
Whether you choose brand new or pre-owned components, research is key. Compare prices and quality to make informed decisions. This approach ensures your project stays on track and within budget.
Installing Used Motorcycle Parts
Fitting pre-owned components into your bike requires precision and patience. Whether you’re working on the engine, forks, or other essential parts, the process demands careful attention to detail. This section will guide you through the steps to ensure everything fits securely and functions properly.

Aligning the Engine with the Frame
Start by positioning the engine within the frame. Ensure the mounts align perfectly to avoid stress on the structure. Use a jack or stand to hold the engine in place while you secure it with bolts. Tighten each bolt gradually to distribute pressure evenly.
Check for any gaps or misalignments. A well-fitted engine ensures smooth operation and reduces wear over time. If you encounter issues, double-check the frame’s compatibility with the engine model.
Fitting the Forks and Ensuring Stability
Next, focus on the forks. Slide them into the triple tree and tighten the bolts to secure them. Ensure the forks are straight and aligned with the front wheel. Misaligned forks can affect handling and safety.
Test the movement of the forks to confirm they operate smoothly. If they feel stiff or uneven, inspect for damage or misalignment. Properly fitted forks are crucial for a stable and comfortable ride.
Using Universal and Model-Specific Parts
Universal parts can be a cost-effective solution, but they may require adjustments. For example, a universal cover might need trimming to fit your bike. Always research compatibility before making modifications.
Model-specific parts, like a CB350F engine cover, are designed for precise fitment. These parts save time and ensure optimal performance. Combine universal and model-specific items to balance cost and quality.
| Component | Challenges | Solutions |
|---|---|---|
| Engine | Misalignment, bolt issues | Use a jack, tighten bolts evenly |
| Forks | Stiffness, misalignment | Inspect for damage, align properly |
| Universal Parts | Fitment issues | Research compatibility, make adjustments |
Double-check every connection and mount to ensure a robust build. If you’re missing any pieces, explore both online orders and local deals. Platforms like Taverner offer a wide range of components, making it easier to find what you need.
Taking the time to fit each part correctly ensures a safe and enjoyable ride. With patience and attention to detail, you’ll achieve impressive results without overspending.
Step-by-Step Assembly and Customisation
Assembling your bike from scratch is both a challenge and a rewarding journey. This section will guide you through the process, from rebuilding the engine to customising key components. With careful planning and attention to detail, you’ll create a ride that’s uniquely yours.

Rebuilding the Engine and Restoring the Frame
Start by disassembling the engine to inspect each part for wear or damage. Clean components thoroughly using methods like vapor blasting or ultrasonic cleaning. This ensures a smooth surface for reassembly.
Next, focus on the frame. Remove rust with sanding and apply a fresh coat of paint. Check for structural integrity, especially if it’s an older model. A sturdy frame is the backbone of your bike.
Reassemble the engine, using assembly lube on moving parts. Tighten bolts in a diagonal pattern to ensure even pressure. This method prevents misalignment and ensures a secure fit.
Customising Your Gas Tank, Seat, and Handlebars
For the gas tank, consider a universal CG125 style option. It’s adaptable and cost-effective. Ensure it fits securely and aligns with the frame.
Custom seats can be fabricated for a perfect fit and personal style. Use high-quality materials for comfort and durability. Adapt handlebars to suit your riding position, ensuring they’re securely bolted.
Customisation is where your project truly comes to life. Take your time to ensure every piece reflects your vision.
Adapting Universal Parts to Your Bike
Universal parts are a great way to save money, but they may require adjustments. For example, a universal cover might need trimming to fit your bike.
When adapting parts, double-check compatibility. Use online resources or consult a dealership for advice. This ensures a seamless fit and optimal performance.
Here’s a quick checklist for adapting parts:
- Verify dimensions and specifications.
- Make necessary modifications for a perfect fit.
- Ensure everything is level and securely bolted.
By following these steps, you’ll create a bike that’s both functional and uniquely yours. Whether it’s a brand new build or a restoration, the result will be worth the effort.
Conducting Safety Checks and Final Adjustments
Ensuring your bike is safe and road-ready is the final, crucial step in your project. After assembling all the components, it’s time to verify everything works as it should. This process involves testing critical systems and making necessary adjustments for a smooth and secure ride.

Testing Brakes, Clutch, and Gear Engagement
Start by checking the brakes. Squeeze the front and rear brake levers to ensure they engage smoothly and provide adequate stopping power. If the brakes feel spongy, bleed the system to remove air bubbles.
Next, test the clutch. Pull the lever to confirm it disengages the engine smoothly. Adjust the cable tension if needed to ensure proper operation.
Finally, verify gear engagement. Shift through all gears while the bike is stationary. If gears feel stiff or don’t engage properly, inspect the gearbox and linkage for issues.
Verifying Electrical Connections and Bolts
Inspect all electrical connections to ensure they’re secure and free of corrosion. Check the battery terminals, wiring harness, and lights. A loose connection can cause electrical failures, so tighten everything as needed.
Go over every bolt on the bike, especially those on the engine, frame, and fork. Use a torque wrench to tighten them to the manufacturer’s specifications. Loose bolts can lead to serious safety hazards.
Here’s a quick checklist for final adjustments:
- Test brakes, clutch, and gears for smooth operation.
- Verify all electrical connections are secure.
- Tighten bolts to the correct torque settings.
- Perform a low-speed test ride to identify any issues.
Once everything checks out, your bike is ready for the road. Taking the time to ensure safety and performance will make your ride more enjoyable and secure.
Conclusion
Bringing your bike back to life is a journey that combines careful planning, detailed research, and hands-on work. From sourcing the right part to conducting final safety checks, every step matters. Make sure each component, from the engine to the fork, is securely fitted and meets local regulations.
Customising your bike not only enhances its performance but also gives you the satisfaction of creating something unique. Whether you’re working on a classic frame or adding a universal cover, the process teaches valuable skills. Every instance of challenge is an opportunity to grow and learn.
Reflect on your project and share your experience with others in the community. For more tips on ensuring your bike’s performance and longevity, check out this guide. Now, it’s time to hit the road and enjoy the ride you’ve built with your own hands.